
Cozy Up To These Pumpkin Rolls
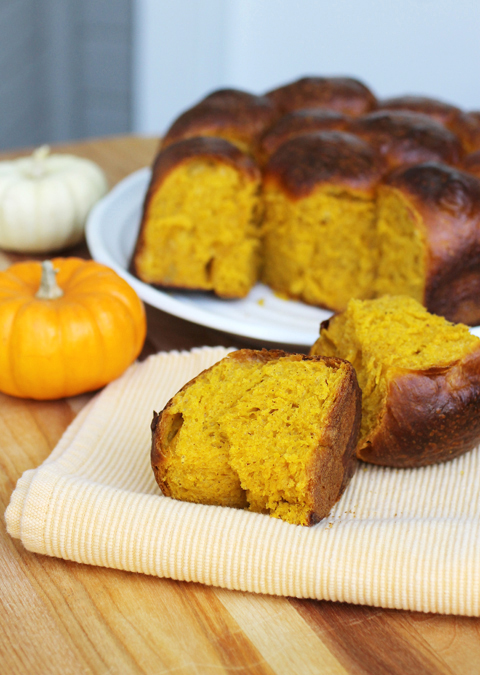
The orange tint of these rolls comes from — what else — pumpkin.
These are called “Pumpkin Cozy Rolls” for a reason.
The dough is so downright pillowy to the touch, you’ll be hard pressed not to lay your head on it to take a nap.
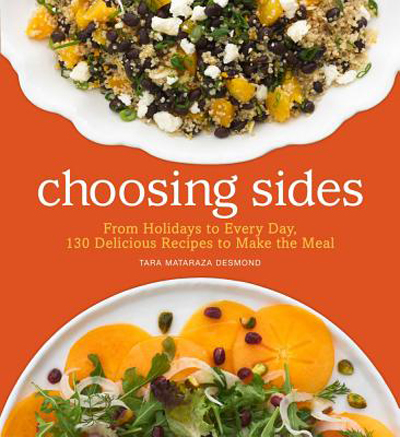
The recipe is from the new “Choosing Sides” (Andrews McMeel), of which I received a review copy. Food writer Tara Mataraza Desmond has crafted this cleverly named cookbook that’s perfect for this time of year — when you’re scratching your head for new side dishes to add pizazz to your holiday table.
The book includes 130 recipes for breads, salads, veggie dishes, grains and stuffings. The directions are detailed and even include suggestions for main courses to pair each side with.
With Halloween here tomorrow, I couldn’t help but be thinking of pumpkins.
The yeasted dough for these rolls is made with canned pumpkin for ease. It’s flavored with cinnamon and maple syrup for a subtle sweet warmth. The dough needs to rise overnight in the refrigerator, so just plan ahead accordingly.
The rolls bake up snuggly in a springform pan. The only alteration I would make next time is to pull them from the oven earlier than the suggested 40-minute baking time. Even though the recipe says to bake the rolls until dark brown, I think mine could have been pulled about 5 minutes earlier as the tops got darker than I would have otherwise liked.
The texture can’t be beat, though. The rolls are soft and buttery, almost like French brioche crossed with Hawaiian bread.
If that’s not a sure-bet crowd-pleaser, nothing is.
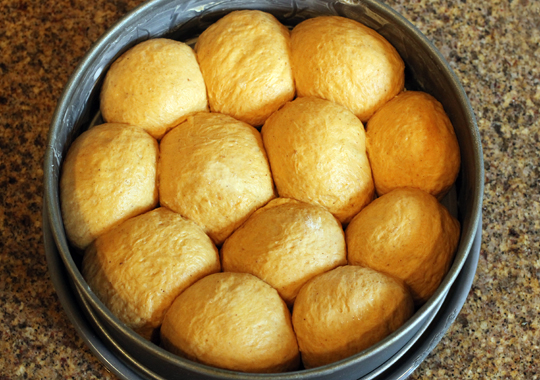
The day after making the dough, the rolls have risen to fit tightly in the pan.
Pumpkin Cozy Rolls
(Makes 1 dozen)
3 1/2 cups unbleached all-purpose flour
2 teaspoons kosher salt
1 teaspoon ground cinnamon or pumpkin pie spice
1 envelope (2 1/4 teaspoons) active dry yeast
1 cup pumpkin puree at room temperature
1/4 cup buttermilk
2 tablespoons pure maple syrup
2 large eggs at room temperature, plus 1 large egg for egg wash
8 tablespoons (1 stick) butter, cut into 1/4 inch cubes, at room temperature, plus 1 or 2 teaspoons for the pan
In the bowl of a stand mixer fitted with the dough hook, whisk together the flour, salt, cinnamon and yeast. Add pumpkin, buttermilk, and maple syrup and mix on medium-low speed (2 on a KitchenAid mixer) until a lumpy, floury mixture begins to form. Stop the machine and scrape the flour that builds up to the sides into the damp mix below it. Start the mixer again at the same speed and mix for about a minute.
Add eggs, one at a time, and mix at medium speed (4 on a KitchenAid) after each addition. Continue mixing for about 3 minutes, until the eggs are completely incorporated, making the dough and the sides of the bowl less visibly wet than when the eggs were first added.
With the mixer running on medium-high (setting 5), add the butter cubes 2 or 3 at a time, pausing to let them blend into the dough until barely visible before adding more. It will take about 5 minutes to work in all the butter. Don’t rush it.
Now let the mixer knead the dough on medium-high speed for a full 10 minutes. The mixer may shake and shimmy slightly; just make sure it stays on the counter-top. The dough will be very tacky at first, sticking to the walls and bottom of the bowl as it slaps against it for the first 7 or 8 minutes. Toward the end of kneading, the bottom and sides of the bowl will be mostly clear of the dough, which will work up into a mass stretched between the hook and the bottom of the bowl.
Butter the bottom and sides of a 9-inch pan. Scrape the dough into the pan, pulling it down off the hook and using a big rubber spatula to release it from the bowl. The dough will feel soft and buttery and will look like shiny, stretchy taffy when it’s being pulled on the machine in a beach boardwalk storefront.
Cover the pan with plastic wrap and let the dough rise in a warm place for 1 1/2 to 2 hours, until doubled in size.
Push the dough out of the pan and onto a very lightly floured surface. Knead it lightly 5 or 6 times to work some of the air out of it and then let it rest for 15 minutes. Cut the dough into 12 equal pieces (about 3 ounces each, if using a scale). Re-butter the springform pan.
Push each piece of dough into a small round boule by shaping it as follows: Make a tight C shape with one of your hands so that only about 1/2 inch of space remains open between your index finger and your thumb and so your palm curves slightly into a cupped shape behind the bottom of the C. Stuff one of the 12 pieces of dough through the middle of the C shape and into the palm of your hand behind it. Turn the dough ball over. Now, using all of the fingers of your free hand, push the dough back up through the “C” so that the part that went down onto your palm first is now going back up through your fingers first. This will create a smooth, round roll shape. Open your hand and pinch the bottom of the dough boule to close up the space where your fingers pushed upward. Put the boules into the springform as you finish them, repeating the process with all 12 pieces of dough.
Situate the rolls inside the springform so they fit snuggly next to one another. Start by setting 3 in the center and then arrange the remaining 9 around them along the perimeter of the pan. cover the pan with the plastic wrap and refrigerate overnight (at least 8 hours and up to 12).
After the refrigerator rise, let the rolls rest, still covered, at warm room temperature for 45 minutes to 1 hour. The rolls will puff up just slightly. Meanwhile preheat the oven to 400 degrees.
Beat the remaining egg with 1 teaspoon of water. Brush the egg wash across the tops of the rolls. Set the springform pan on a baking pan and transfer to the oven. Bake the rolls for 35-40 minutes, until the tops are dark brown and an instant-read thermometer registers 190-200 degrees when inserted into the center of a roll.
Let the bread cool in the pan to just warm, about 30 minutes. Release the springform and then separate the rolls by cutting them with a serrated knife along the visible dividing lines. Serve immediately.
Tip: Make the rolls 1 or 2 days in advance, cool completely, and reheat, covered with foil, in a 350 degree oven for 10 to 15 minutes.
Adapted from “Choosing Sides” by Tara Mataraza Desmond
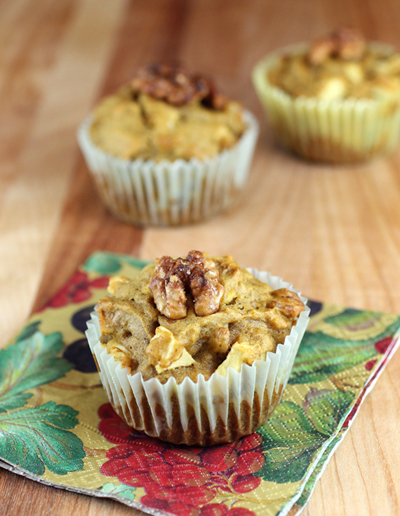
More Pumpkin Recipes: Apple-Pumpkin Walnut Muffins

And: Pumpkin Swirl-Ice Cream Pie with Chocolate-Almond Bark and Toffee Sauce
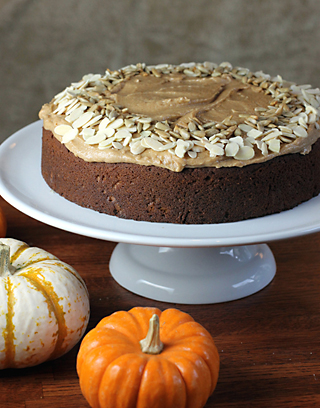
And: Pumpkin Almond Cake with Almond Butter Frosting

This are so seasonally appropriate! And so great looking. We’ve been having loads of fun with pumpkin and other winter squash, but haven’t baked any bread yet. Need to do that. Sounds like a good book – thanks.
You mentioned adding buttermilk in the directions, but the amount of buttermilk isn’t included in the ingredients.
Sue: Thanks for catching that. I just added it: It’s 1/4 cup buttermilk.
These look perfect for Thanksgiving! Are they more savory or sweet? I’m not good at baking with yeast, but I want to give these a try.
Wow, they look so fluffy. I want to eat the entire batch!
Beautiful! Those rolls look so smooth and delicious.
Cheers,
Rosa
That looks good. But for some reason I keep thinking it needs a coating of cinnamon icing on the top!
looks so good! i should make these with the puree i have in my fridge right now. thanks for the inspiration!!
Ben: I like the way you think! Actually, these would be heavenly smeared with some soft butter or cream cheese, and drizzled with a little maple syrup, too.
These look super tasty, and a perfect side to a harvest time roast dinner. I recently wrote a tutorial for DIY pumpkin puree on my blog. Making everything from scratch makes everything a million times yummier (and definitely makes you feel super proud knowing you made all of it)! Thanks for sharing this recipe. I’m definitely going to check out this book and I can’t wait to try out these rolls! Mmm, mmm! 🙂
they look yummy! i just had some pumpkin bread from orwasher’s here in the city and it was divine!
when i see the words ‘pumpkin roll’ i immediately think of the dreadful thin cake filled with frosting and rolled into a tube–i hate making those! this is much better. 🙂
How did you handle the yeast? Did you warm up the liquid as the packet directed? If not, will a dry yeast make the bread dough rise?
I have done a lot of bread baking with the dry yeast and the rapid rise yeast, and both required warm liquid to activate the yeast.
Ronie: I just followed recipe directions and dumped the yeast in with the dry ingredients to start. The rolls definitely rose, as you can see from the photos. So, it should work for you as is.
Pingback: Thanksgiving Sides from friends old and new
Yuck. Tasted a bit bitter and cooked a bit too fast (had to turn oven down – browned too fast – as you mentioned). Sounded great on paper, looked beautiful, but needed salt? sugar, something?? Can’t quite place it, but this one won’t be repeated in our house. I had such high hopes 🙁
Dan: Oh no, not a yuck! The rolls are definitely not that sweet. They have a twinge of sweetness, but they are not sweet rolls by any means. Did you have them with butter? Sorry to hear they didn’t pass muster with you. I hope you have a delicious Thanksgiving despite that. 😉
Pingback: Cheesy Gluten Free & Dairy Free Couscous Bake
Pingback: Healthy Cheesymite Scrolls
Pingback: Nishan Kohli